 learndesign
Six by Six
You get a six-foot cube of space in a place people already pass through, and a pile of lumber. What goes there is yours to work out, and you have to prove it was worth building.
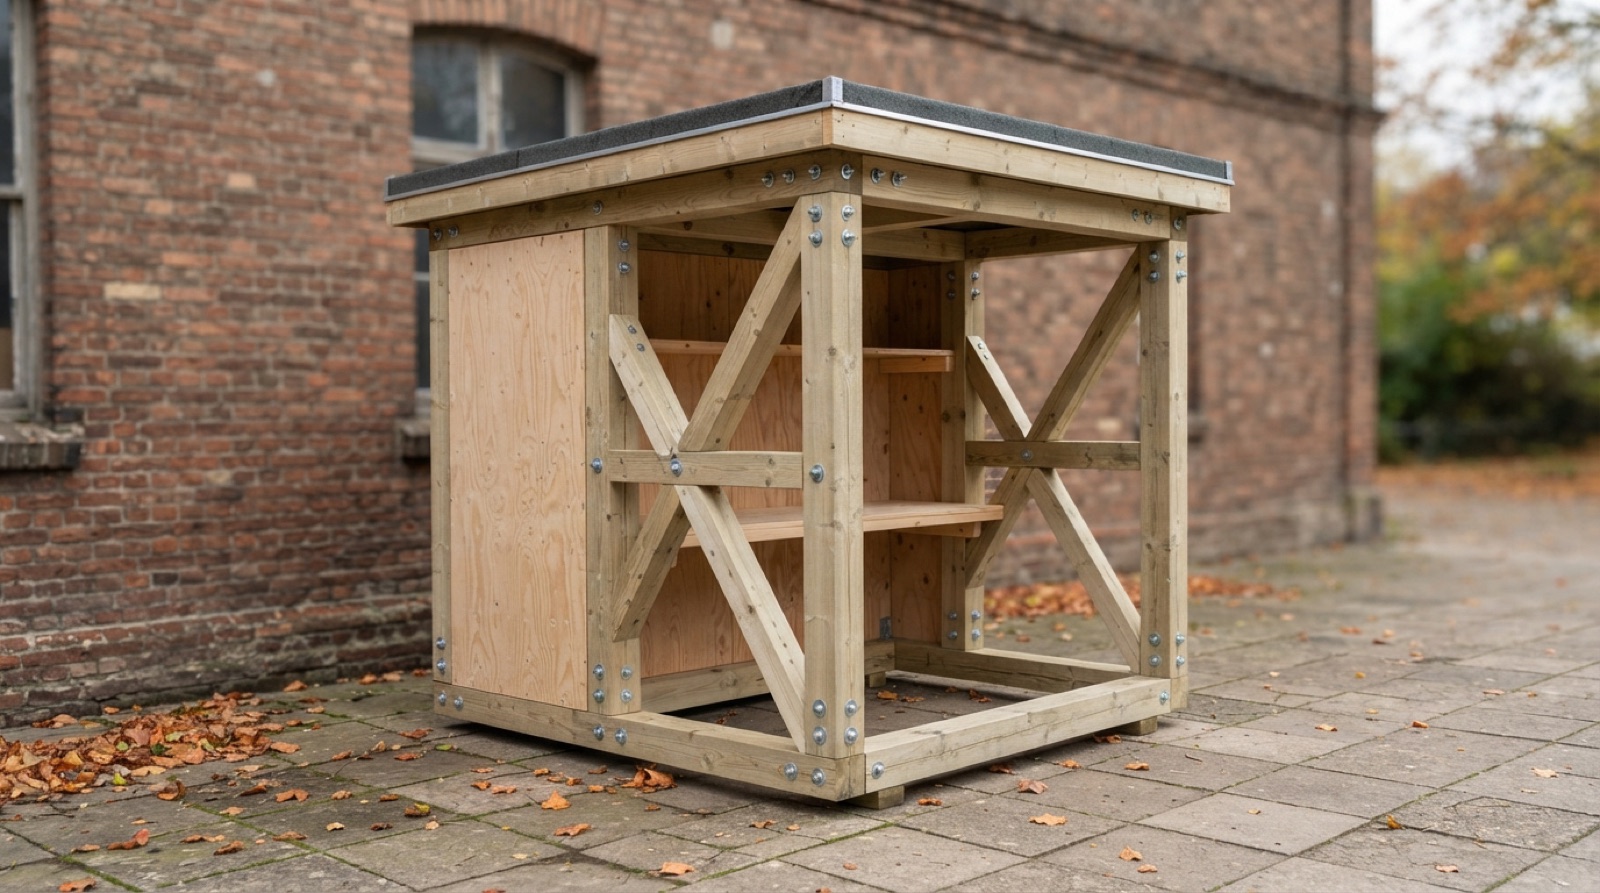
Overview
You get a square of space six feet on a side, in a place people already walk past every day. You decide what belongs there. Then you build it, install it, and watch whether you were right.
The brief is deliberately open, because finding the opportunity is the hard part. Two things count as a good answer. You can solve a problem: something in that space is going badly, and your build fixes it. Bags end up on a wet floor. There is nowhere to sit where the sun actually is. A door gets propped open because nobody can put anything down while they open it. Or you can create an affordance: nothing is going wrong, but your build makes something possible that nobody is doing yet. A surface at standing height turns a corridor into a place to work for five minutes. A rack turns dead wall into somewhere to leave a board. A roof turns a bench nobody uses in the rain into one people use all year.
Either way, the work is not finished when you have an idea. You have to convince a room that the idea is justified and worth building, and the evidence you bring has to be about your idea. General complaints do not count. If you are building somewhere to sit, show how many people stand and for how long. If you are building shelter, show what happens to that spot when it rains. Evidence that supports the specific improvement you are proposing is the thing that separates a design from a decoration.
You work in a group. The envelope is fixed and it is not negotiable:
- Six feet by six feet on the ground, and no more than six feet tall. Nothing overhangs the square.
- Primarily lumber. Dimensional lumber and sheet goods do the structural work. Other materials appear as hardware, fasteners, finish and small fittings.
- It comes apart. The whole thing has to be demountable with hand tools, into pieces two people can carry, and it has to go back together from your drawing.
- It leaves the shop. You build indoors and install on site, so every part has to fit through a standard doorway.
- It survives being used. People will sit on it, lean on it, climb it and leave it out in the weather.
Six feet of height sounds like a lot until you stand under it. If you are putting a roof on, work out early who fits underneath and what they are doing there, because a 6’ roof is head height for most people and lower than that once you allow for the structure.
Skills needed
- Reading a site and watching how people use itresource coming
- Lumber: actual sizes, grain, crown and how a 2x4 failsresource coming
- Framing, sheathing and bracing a structure that carries loadresource coming
- Demountable connections: bolts, threaded inserts and T-nutsresource coming
- Modelling an assembly and pulling a cut list from it↗
- Costing a bill of materials with real pricesresource coming
- Making the case for a design with evidenceresource coming
Assessment
| Criterion | Developing | Proficient | Exemplary |
|---|---|---|---|
| The case | An idea is stated but the evidence is general opinion, or does not connect to what is being built. | Observation and first-hand evidence show the problem or the opportunity is real, and it lines up with the proposal. | The evidence is specific, gathered more than one way, and it visibly shaped the design. The room is convinced. |
| Design resolution | The build does not clearly deliver what the case promised. Dimensions come from guesswork. | The design does what the case says it will. Sizes come from measured people, objects and the site. | Details resolve more than one need at once. Decisions have reasons that trace back to the site study. |
| Structure and safety | Racks, wobbles, or has edges and pinch points that would hurt someone. | Braced against racking, stable on the actual surface, no exposed hazards, fasteners appropriate to the load. | Load paths are deliberate and explained. Stability was tested under abuse, not assumed. |
| Demountable assembly | Comes apart only by breaking something, or cannot be rebuilt from the drawing. | Comes apart with hand tools into carryable pieces, parts are numbered, and the drawing is followable. | Someone outside the group rebuilds it correctly with no help. Connections are designed for repeated use. |
| Finish and durability | Rough, unsealed, or already failing within a week. | Edges eased, surfaces sealed, hardware appropriate to weather and wear. | Built to be maintained. Wear points identified, and the repair is designed in. |
| Evidence of use | No record of what happened after installation. | Use was observed and reported honestly, including what did not work. | The observations are compared against what the group predicted, and the gap is explained. |
Deliverables
- A site study of the footprint, with measurements, photographs and a record of how the space is used now
- The case for the build, stating the problem being solved or the affordance being created, and who benefits
- A proposal presentation that argues the idea is worth the material and the space
- A Fusion assembly of the whole structure, with a cut list and a hardware list
- A costed bill of materials with sources and lead times
- An assembly drawing someone outside the group could follow, and a numbered set of parts
- The structure, built and standing on its site
- Observations of how people used it in the week after it went up
- A teardown and storage plan
- An individual contribution statement and design journal
Materials
- 2x4 and 2x3 SPF lumber
- Plywood: 12 mm and 18 mm, exterior grade if the site is outdoors
- Structural screws, carriage bolts with washers and nylon-insert nuts
- Threaded inserts or T-nuts for connections that come apart repeatedly
- Exterior finish or paint
- Adjustable feet or shims for an uneven surface
Steps
Week 1: Find the opportunity
- Walk your footprint. Measure it, including the vertical clearance, the surface it sits on and how far out of level that surface is. Photograph it at the times of day it actually gets used.
- Watch the space without designing anything. Count people. Time how long they stay. Note where they stop, what they carry, what they put down and what they walk around. Do this on more than one day.
- Look for the traces people leave: worn ground, bags on the floor, chairs dragged out of position, a door propped open, a spot everyone avoids. Traces are evidence that nobody had to be asked for.
- Talk to eight or ten people who use the space and are not in your group. Ask what they do there, not what they want built. People are unreliable about what they want and very reliable about what they already do.
- Write the opportunity in one sentence. State whether you are solving a problem or creating an affordance, who it is for, and what will be different afterwards.
- Sketch widely and cheaply. Twenty ideas on paper before anything gets modelled.
Week 2: Learn what lumber will and will not do
- Lumber basics. A 2x4 is not 2" by 4". Learn the actual sizes, read grain and crown, and find out how a board fails in bending and in compression.
- Cut square and join strong. Practise a square corner, then a braced corner, then a lap. Learn why a rectangle folds flat and a triangle does not.
- Frame and sheathe. Build a small frame with a plywood skin and push it sideways. Understand what the sheathing was doing.
- Design the connections that come apart. Carriage bolts with washers and nylon-insert nuts, threaded inserts, T-nuts, and where each one belongs. Screws driven into end grain repeatedly will not survive teardown.
- Model the whole structure as a Fusion assembly with real lumber sizes, and pull a cut list and a hardware list from it. If you cannot produce a cut list, the design is not finished.
- Cost it. Real prices from real suppliers, real quantities, and the lead time on anything that has to be ordered.
Week 3: Make the case, then start cutting
- Present the proposal. The site and what you observed; the evidence; the problem or affordance in one sentence; the design and how it answers the case; the structure and how it comes apart; the materials, the cost and the schedule. Your job is to convince the room the build is justified and valuable.
- Take the feedback and the questions. Revise the plan, the drawing and the cost.
- Mark out the footprint full size on the shop floor and stand inside it. Almost every group discovers something here.
- Cut the frame members and label every one against the cut list.
- Dry-assemble the main frame with clamps before anything is permanent.
Week 4: Build it
- Assemble the structural frames, bolted at the connections that have to come apart.
- Cut and fit the sheet goods. Ease every edge a hand will touch.
- Add the parts that do the actual work: the surface, the seat, the hooks, the shelf, whatever your case said this was for. Size them from the people and objects you measured.
- Test it like a stranger would. Sit on it hard, lean on it, load it past what you expect, push it sideways. Fix what moves.
- Finish and seal. Number every part and every matching joint so the rebuild is obvious.
- Take it apart, carry it out, and put it back together on the site. Level it and make it stable on the real surface, which will not be flat.
Week 5: Find out whether you were right
- Leave it alone and watch. Same method as week one: count, time, photograph, note. Do not stand next to it explaining it to people.
- Compare what happened with what you predicted. Where the two disagree, say so and work out why. A build that got used differently than planned is a more interesting result than one that did nothing.
- Fix what the first week exposed.
- Write the teardown and storage plan: the order it comes apart in, what the parts are called, what hardware goes where, and what it needs before it goes up again.
- Hand in the drawing set, the cost sheet, the observations and your individual contribution statement.
Stretch options
- Design it to be rebuilt somewhere else. A second site with a different surface and different traffic, from the same parts.
- Design for disassembly all the way down. Every component recoverable as usable material at end of life, with nothing glued, painted or composited that would stop it.
- Run a before-and-after count with enough observations that the difference means something, and present it as data rather than as an impression.
- Make it adjustable. One structure, two configurations, changed by one person in ten minutes.
- Design the maintenance. What fails first, how someone spots it, and how they fix it without the drawing.