 learndesign
A prop for stage or screen
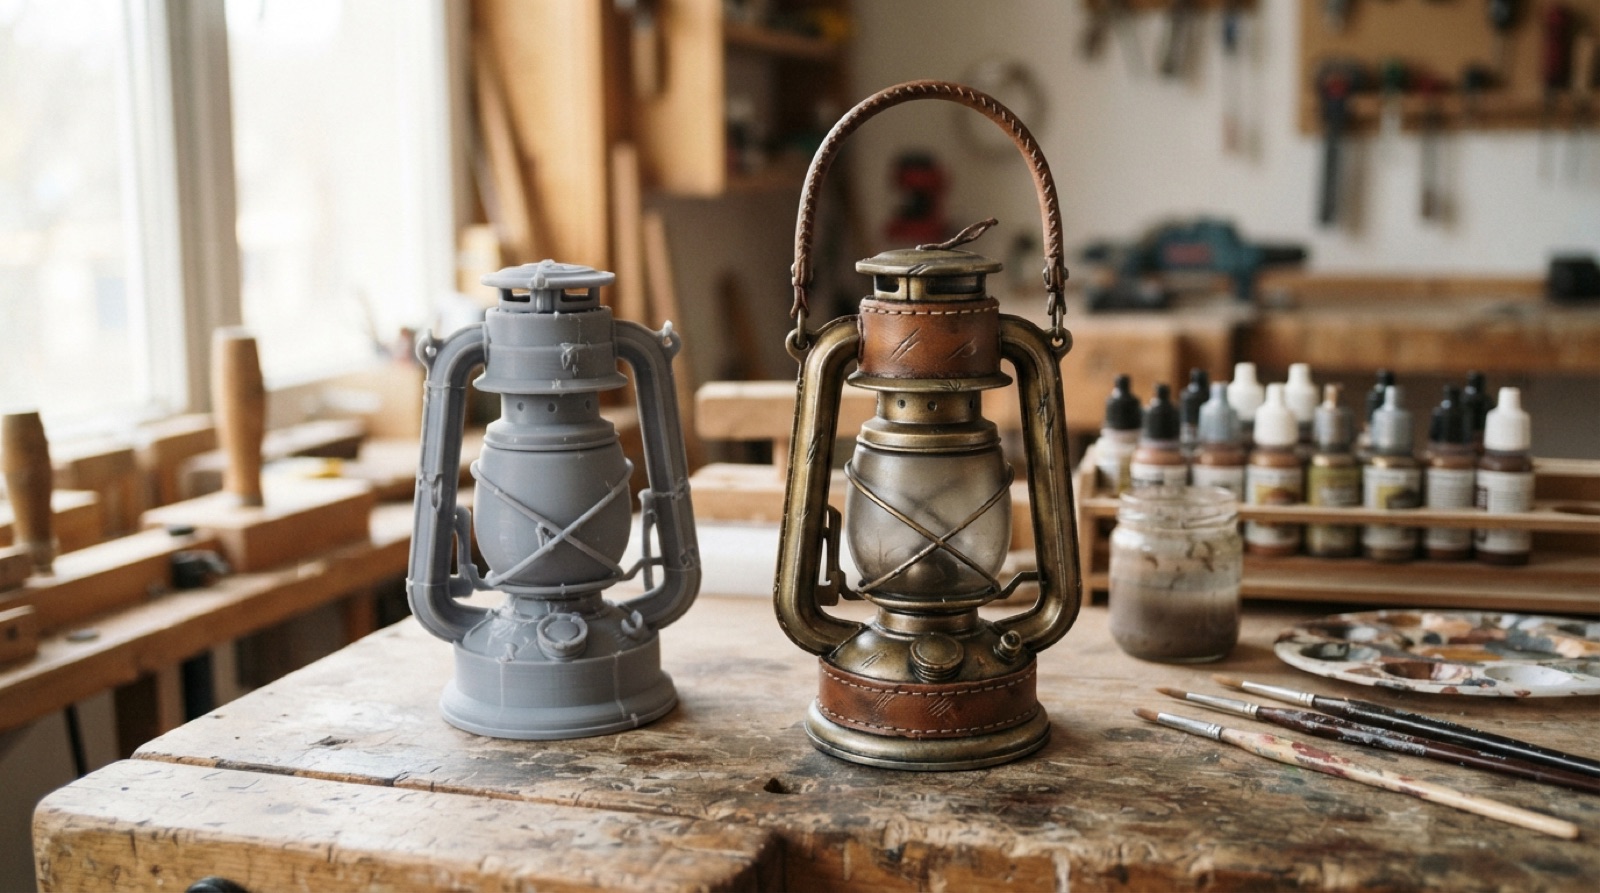
Design and make one hand prop that has to be believed. A key, a lantern, a device, a weapon that is not one, a book that does not exist. It has to read from the distance it will be seen at, survive the run, and be safe in an actor's hand.
Overview
A prop is an object that has to be believed for as long as it is on stage or in frame, and not one second longer. A lantern that reads as brass from the tenth row can be plastic and paint. A book that a character reads on camera needs a real cover and real pages, because the lens is 50 cm away. A sword that is drawn eight times a week has to be blunt, light and unbreakable, and has to look like it could kill someone.
So the first question is not what it looks like. It is who holds it, how far away the viewer is, what happens to it, and how many are needed. From those answers you decide what to model faithfully and what to fake, what to print and what to form or cut, and how to paint it so the light does the rest.
This project makes one prop, properly. Brief, reference, design, manufacture, finish, test. Then a second copy or a stunt double, because a prop that exists once is a liability.
Skills needed
- Reading the prop's jobWho handles it, what they do with it, how far away the audience or lens is, how many times it has to work, and whether it has to break, open, light up or be thrown.
- Reference and designReal objects the prop pretends to be, studied for proportion, wear and how they are held. Then a design that exaggerates what reads and drops what does not.
- Modelling for print and formingSplit for the printer's bed and for strength; hollow for weight; thin shells vacuum formed where the shape allows; laser-cut flat parts where they are faster.
- Finishing that fools the eyeFiller, primer, sanding, base colour, then washes, dry brushing, and wear where hands go. Metal from paint; leather from paint; age from dirt.
- Safety in the handNo sharp edges, no points, no weight that hurts on a drop, nothing that shatters. A weapon prop is blunt, soft-tipped or rubber, and it says so on the tag.
- RepeatabilityA hero prop and a stunt double, or three copies for a run. Moulds, prints and a paint recipe so the second one matches the first.
Assessment
| Criterion | Developing | Proficient | Exemplary |
|---|---|---|---|
| Brief | The object named, no context | Story, handling, distance and count defined | Brief predicts what will fail (a hinge, a finish where hands go) and the design prevents it |
| Reference and design | Copied a picture | Real objects studied; kept, exaggerated and dropped features listed with reasons | Design reads better than the real object would at the stated distance |
| Manufacture | One print, seams visible, wrong process for the part | Right process for each part; splits hidden; parts fit | Weight and strength engineered; a mould or repeatable process produces the second copy |
| Finish | Flat paint on plastic | Primed, sanded, base coat, wash, dry brush; reads as the material from the distance | Wear is where hands go and the story says; holds up at 30 cm |
| Safety and handling | Edges, points, or heavy | Meets every safety constraint; tested by drop | Stunt version designed for what actually happens to it in the scene |
| Recipe and record | None | Ordered recipe with products; tests recorded | Second copy matches the first closely enough to swap on stage |
Deliverables
- A prop brief: the story, the character, what the prop does in the scene, viewing distance, handling, and how many are needed
- A reference board with real objects and a sketch showing what is kept, exaggerated and dropped
- The Fusion model, split for manufacture, with print, form and laser parts identified
- The finished hero prop, and either a second copy or a stunt version
- The paint and finish recipe, in order, with product names, so it can be repeated
- A drop, handling and distance test record, with a photograph from the viewing distance and one from 30 cm
Materials
- PLA or PETG; filler primer, spot putty, sandpaper 120 to 600
- HIPS or PETG sheet for vacuum forming; 1/8" plywood or MDF and acrylic for laser-cut parts; EVA foam for anything that gets swung
- Acrylic paints, metallic paints, a black and a brown wash, matte and satin clear coats
- Leather scraps, cord, brass hardware, glass or acrylic lenses, small LEDs and a coin cell if it lights
- Two-part epoxy, CA glue, contact cement, and a Dremel for clean-up
Steps
Week 1: Brief and reference
- Choose the prop and the scene. Write the brief: who holds it, what they do with it, how far the viewer is, how many performances or takes, and whether it must open, light, break, or be thrown.
- Collect reference of the real thing, or of the real things it is made of: how a brass lantern is put together, how leather wears, how a cast-iron key is shaped. Photograph objects you can hold.
- Sketch it three ways: faithful, exaggerated for distance, and simplified for manufacture. Mark what is kept, exaggerated and dropped, with a reason for each.
- Decide the process for each part: printed, vacuum formed, laser-cut, foam, found. A lens is acrylic; a thin shell is formed; a handle is printed; a blade is foam over a printed core.
Week 2: Model and make parts
- Model it in Fusion at full size, as an assembly. Hollow the big parts. Put split lines where seams are hidden by a band, a step or a texture. Add pins and sockets to align parts.
- Model the mould for any formed part with draft and a pull direction. Model the laser parts flat, with the material thickness as a parameter.
- Check strength where it is handled: a handle joint, a hinge, a ring. Thicken, add a metal pin, or embed a rod.
- Print, form, and cut. Keep the print settings and the forming temperature in the record.
- Dry-fit everything. Fix the fit in the model, not with a file, if a second copy is coming.
Week 3: Finish
- Fill the seams and layer lines: spot putty, filler primer, sand. Repeat until a raking light shows nothing. This is most of the work and most of the result.
- Base coat in the darkest colour of the material. Metallic over it for metal; a mid-brown for leather; off-white for bone.
- Wash with thinned black or brown into every recess, wipe the high spots. Dry brush a lighter tone across the edges.
- Add wear where the story puts it: hands, pockets, the ground. Scratches on a blade edge, polish on a handle, dirt in a hinge.
- Clear coat, matte on most things, satin on metal. Photograph from the viewing distance and from 30 cm.
Week 4: Test, duplicate, hand over
- Handling test: do what the scene does, twenty times. Open, close, swing, drop from 1 m onto the floor. Fix what breaks and record it.
- Distance test: put it at the stated distance under a work light and photograph it. Ask three people what it is made of.
- Make the second copy or the stunt version from the same files and the recipe. Compare them side by side.
- Tag it: prop name, production, handling notes, “prop, not a weapon” if it applies. Bag it.
- Write the final record: brief, process, recipe, tests, and what the next version would change.
Stretch options
- A practical prop: a lantern that actually lights on a hidden switch, with the battery accessible without tools.
- A breakaway version that shatters safely and can be reset between shows.
- A period prop researched to a year, with a page on what you found and what you faked.
- A set of six matching props for an ensemble, with the mould and jig that made them.