 learndesign
Every object tells a story
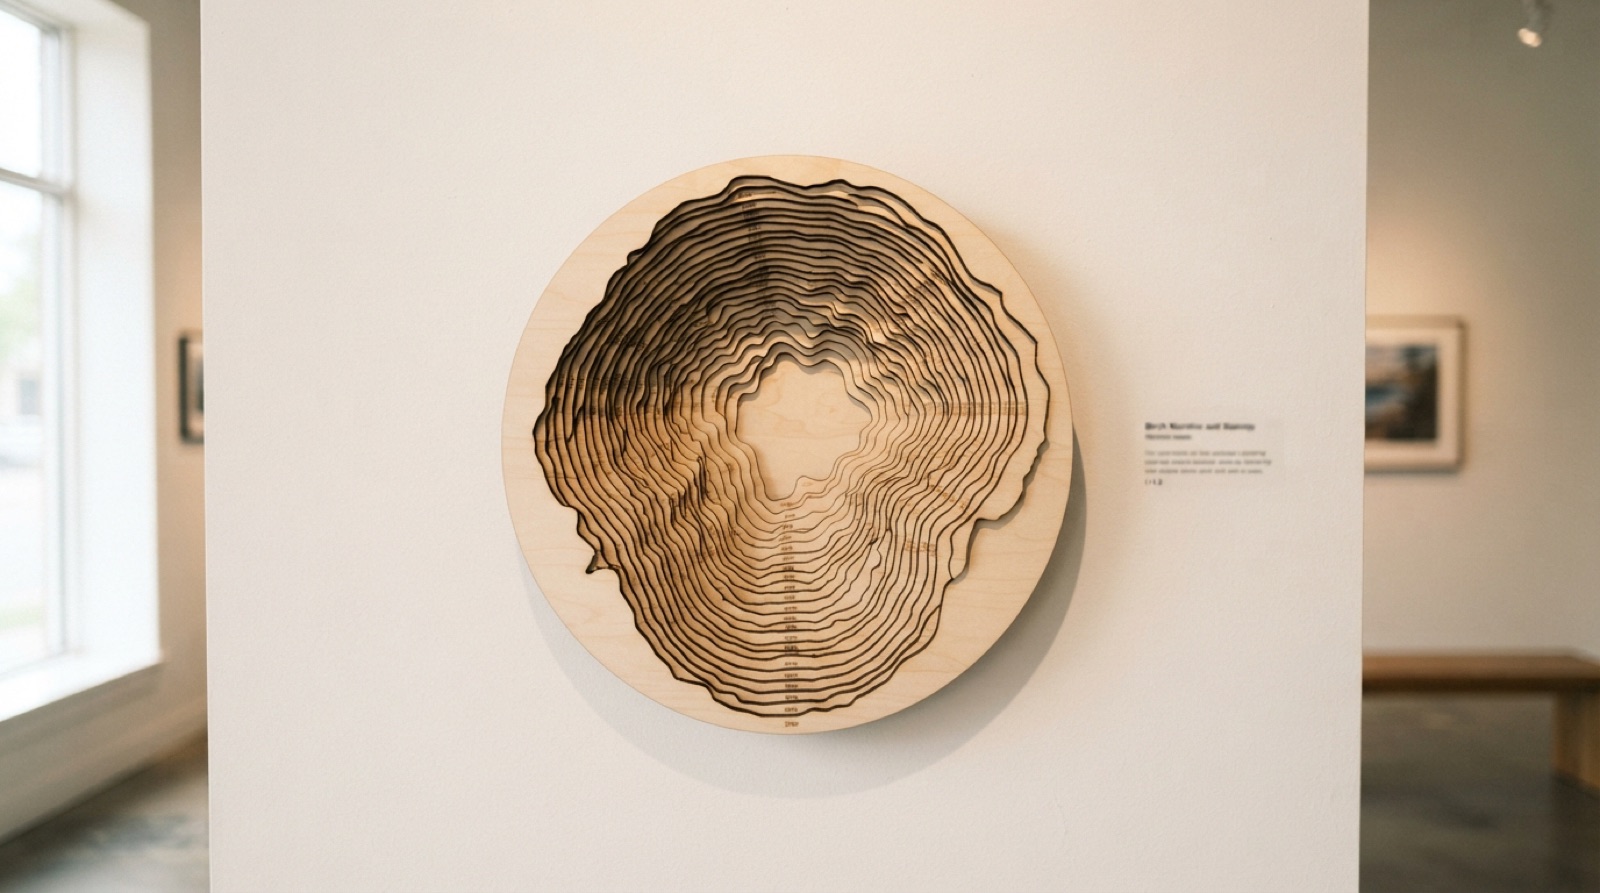
Design prompt: tell a compelling story about sustainability. Technical skill: laser cutting, with vinyl wall lettering for the label. Displayed museum-style.
Overview
Every object tells a story. In a museum the object usually came first and the label was written afterwards. Here it runs the other way. You start with a story about sustainability that is worth telling, and you design and laser-cut the object that tells it.
Sustainability is a big word, and big words make bad stories. The story has to be small enough to be true. “Recycling” is a category, and nobody stops for a category. “The fourteen coffee cups I threw out last week, cut at actual size” is a story. So is the growth of one tree, the parts of a broken thing that could have been fixed, the distance a lunch travelled, the water in a pair of jeans, the shoreline of a lake that used to be bigger, a repair that held. It can be about a material, a place, a habit, a system, a loss or a fix. It has to be specific, it has to be true, and it should be something you found rather than something you were told.
The prompt and the skill are independent on purpose. Nothing about sustainability says “plywood on a laser”. Finding the place where a stack, a joint, a hinge, an engraving or a cut form tells the story better than a picture would is the design work. Lamination (stacking layers), finger joints, tab-and-slot, living hinges and kerf bends, engraving, and any combination are all open to you, and the better artifacts usually combine two or three.
Then it goes on display, museum-style. The artifact sits on the wall or on a plinth, a vinyl label to its right, and a stranger walking past should have a reason to stop. How it attaches is your call: fix it straight to the wall with a keyhole or a cleat, or design a small printed clip if the form needs one. The mount is a means, not the point. Keep it quiet.
Skills needed
- Laser cutting, requiredThe technical skill for this project. The artifact has to be made, primarily, on the laser.
- Vinyl wall lettering, requiredThe second half of the skill. The label is cut vinyl on the wall, in the house style. Feature size, islands and bridges.
- How the laser cuts, and what kerf does to a fitPower, speed and focus; vector and raster; why a slot drawn at 3 mm is not 3 mm.
- Lamination, slicing a solid into layersModel it in 3D, section it at material thickness, cut the stack, register it with pins.
- Finger joints and tab-and-slotFinger width in multiples of the material, kerf compensation, a test corner before the real one.
- Bending wood on the laserLiving-hinge patterns and kerf bending. Minimum radius, grain direction, where it snaps.
- Intersecting slicesHalf-lap slots for forms built from crossing profiles.
- Engraving a surfaceRaster settings on plywood, line weights that survive, a test swatch first.
- Mounting for displayKeyhole slots, French cleats, screws straight into the plywood face, or a small printed clip when nothing off the shelf fits.
- Finishing plywoodSanding, dealing with char, glue-up, edges, oil or paint.
- Writing a museum labelA title, a one-line identification, and under 60 words that earn a second look.
- Building a display moduleA 2x3 frame faced with 1/2 in plywood, dropped onto a plinth base and bolted. Filled, sanded, primed and painted flat white.
Assessment
| Criterion | Developing | Proficient | Exemplary |
|---|---|---|---|
| Answers the prompt | A category, not a story. The label could be about anything, or it lectures. | A true, specific story about sustainability that belongs to this artifact, found by the maker, told without a lecture. | The story changes how a stranger sees something ordinary, and they can say what it was. |
| Uses the skill | One technique, used as it came off the tutorial. Fits are loose or forced. The same thing could be a printout. | Two or more laser techniques chosen for what the story needs. Joints and stacks fit from tested parameters. | Technique and story are inseparable. Take the laser away and the idea goes with it. |
| Label and lettering | House style broken, typos, weeding damage, bubbles, or the words do not match the object. | Follows the house style exactly. Clean, straight, readable. Words and object tell the same story. | Word choice does real work. The label makes the object mean more than it did a second ago. |
| Modelling and cut files | Parts drawn by eye. Nothing accounts for kerf or thickness. | Modelled with parameters for material thickness and kerf, tested on a coupon, then cut. | The model is built so that a change to material or scale flows through without redrawing. |
| Finish and material use | Char everywhere, glue squeeze-out, raw edges, and a sheet’s worth of scrap for a hand-sized object. | Sanded, cleanly glued, edges dealt with, finished evenly. Parts nested, offcuts used, material cost known. | The finish is a decision that supports the story, and the material use is part of what the story says. |
| Display and install | Hung at a random height, crowding its neighbours or its 300 × 450 mm space, mount showing more than it should. | Sensible height, breathing room, level, secure to the panel, inside its space, the mount doing its job quietly. | The piece sits correctly in the wall as a whole, not just on its own. |
Deliverables
- The artifact, laser-cut and finished, displayed and secure on the display wall, inside its 300 mm × 450 mm space
- The vinyl label beside it in the museum style, cut and applied by you
- The Fusion or Illustrator files and the cut files behind it, with the test pieces that led there
Materials
- Offcuts from the scrap bin first; 3 mm plywood, and 6 mm where a part needs it, when the design earns new stock
- Acrylic or card for accents if the story calls for it
- Wood glue, dowels or bamboo skewers for registration, clamps
- Finishing supplies: abrasives, oil or paint, a rag
- Screws, a keyhole or cleat blank, or a plinth blank for the artifact
- A little PLA if the mount needs a printed clip
- Sign vinyl in the house colour, transfer tape, squeegee
- Calipers, masking tape, level
Steps
Stage 1: Type and the cutter
- Learn how a drag knife actually works, and why it is not a printer. Watch for feature size, islands and bridges. Anything too fine or fully enclosed will not survive weeding.
- Set type in Illustrator. Typeface, size, tracking, hierarchy.
- Choose a quote, cut it, and transfer it to glass or a wall. This is the rehearsal for your label, and it is where you learn transfer tape on something that does not matter yet.
Stage 2: Three ways to build with a laser
- Lamination. Model a small solid in Fusion, section it at your material thickness, and cut the stack. Add registration holes for dowels before you cut. Glue it up and see where the layers drift.
- Finger joints. Set finger width and kerf as parameters, cut a test corner, and adjust until it goes together with a tap and stays. Then a small box.
- Bending. Cut a living-hinge coupon and a kerf-bend coupon. Find the radius each one reaches before it cracks, and note which way the grain ran.
- Engrave a swatch at three settings and keep it. You will be choosing from it later.
Stage 3: Find the story, then propose
- Look for the story where sustainability actually shows up in your own week: the bin, the lunch, the commute, the closet, the tap, the thing that broke. Count something. Measure something. Ask someone. Bring back one fact you did not know before.
- Write the label draft before you design anything. If you cannot write 40 honest words about this specific thing, look again.
- Sketch at least three artifacts that could tell it, using different techniques: one stacked, one jointed, one bent or engraved. Pick the one where the technique helps the story, not the one that is easiest to cut.
- Decide how it will be displayed and how it attaches. Straight to the wall, on a cleat, on a plinth, or with a printed clip. The wall face is 1/2 in plywood, so a screw holds anywhere. Check the whole thing, mount included, fits inside 300 mm × 450 mm.
- Record the Design Proposal: how you brainstormed and sorted ideas, what the artifact will look like, why this one and how it fits every deliverable, the tools, techniques and materials you will need, and what you are looking forward to and unsure of.
Stage 4: Build the display module
- Frame a 48 in by 72 in panel from 2x3 on edge: plates top and bottom, studs at 16 in, one row of blocking at mid-height. Square and plumb before the face goes on.
- Glue and screw a 1/2 in plywood face to it. Build the plinth base the same way, a 48 in by 20 in ladder frame skinned in 1/2 in ply, with two 24 in locating posts that sit inside the panel’s end bays. Drop the panel on, drill through the end studs into the posts, and bolt it.
- Fill the screw heads and the joint where the ply edge meets the studs, sand to 150, prime, then two coats of flat white. Grain shows a little in raking light and disappears at three metres.
Stage 5: Model, cut, finish, install
- Model the artifact in Fusion, or in Illustrator if it is flat. Material thickness and kerf are parameters, never typed numbers. Name the parts. Nest them on the sheet or the offcut you actually have.
- Cut the critical part first: the joint that has to fit, the hinge that has to bend, three layers of the stack. Fit it. Adjust. Then cut the whole thing.
- Assemble dry, then glue. Clamp stacks flat. Check square on boxes before the glue sets. Keep the offcuts and weigh them.
- Finish it. Sand, deal with the char, treat the edges, oil or paint. Decide whether the artifact disappears against the wall or declares itself, and be able to say why.
- Make the mount: keyhole slot cut into the back, a cleat, screws into the plywood face, or the printed clip if you designed one. Test that it holds and that it comes off.
- Cut and weed the label, and back it with transfer tape.
- Install. Fix the artifact, level it, apply the label with the hinge method.
- Check it from three metres, from two, and from directly beside it. Those are three different pieces of information and all three have to work.
- Write the curator’s statement: why this story, why this form, and what it cost in material.
Stretch options
- Make it entirely from the offcut bin, and say so on the label.
- Light it. A small LED strip in a channel cut into a back layer, or behind a stack so the layers throw shadows.
- Make it move. A crank, a cam or a living hinge that lets the viewer do something, or change something.
- Build it in two materials. Plywood with an acrylic layer where the story needs light through it, or a recovered material where the story is the material.
- Add a QR code to the label linking to the data behind the story.
- Design a second artifact that shares the mount, so the display outlives this one exhibition.