 learndesign
3D-printed RC vehicle
Design and print a radio-controlled car, boat, plane, drone or submarine around a shared set of electronics. Pick the vehicle; the CAD, the wiring and the assessment are the same.
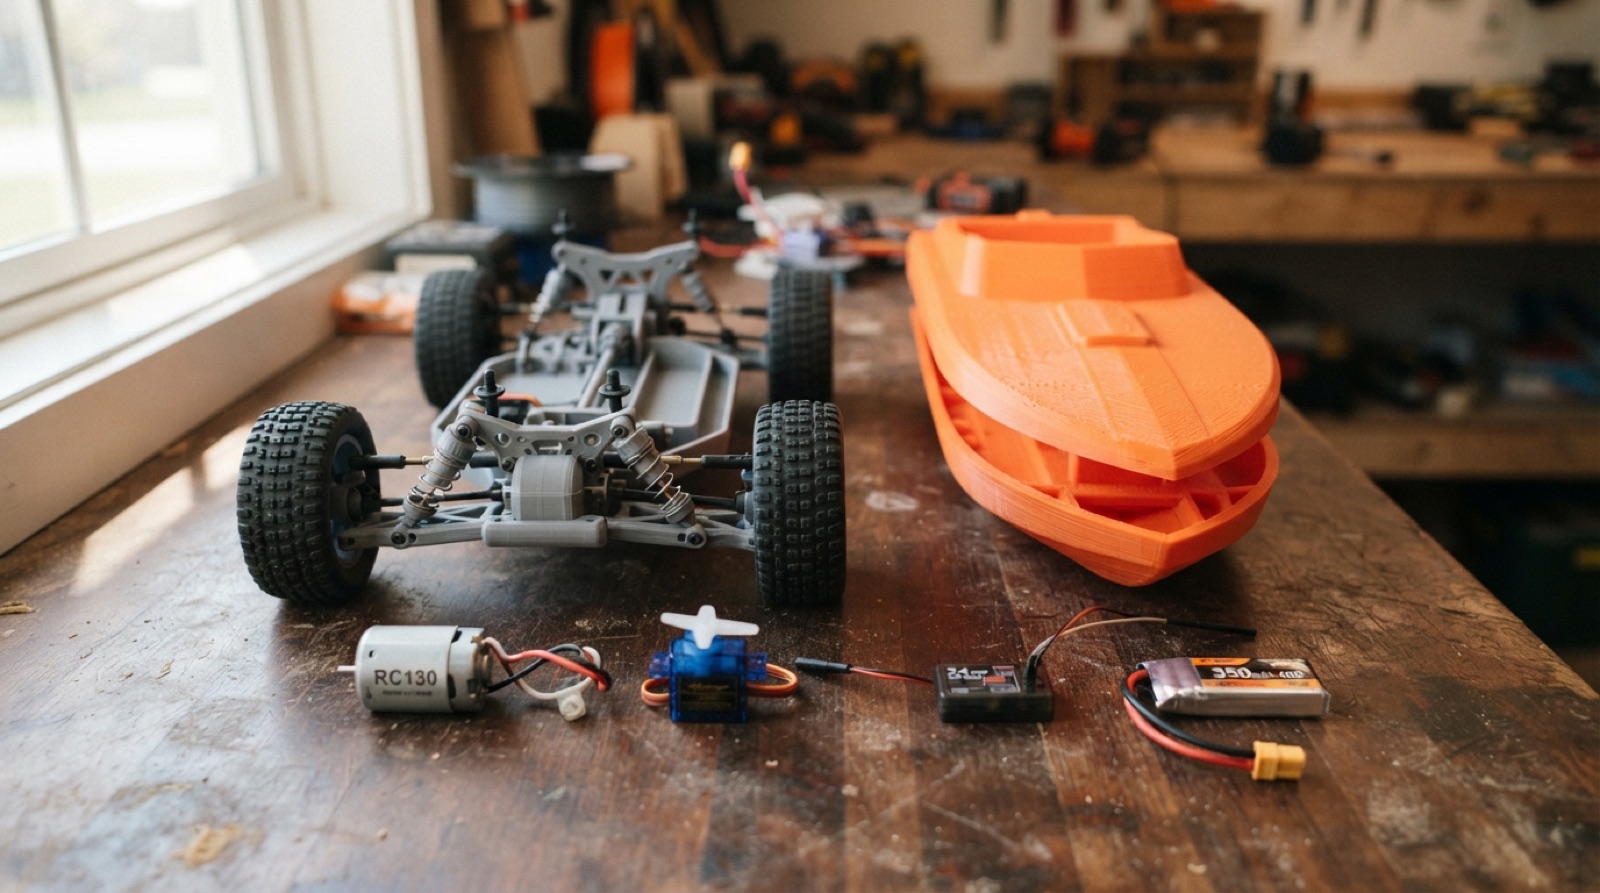
Overview
Every RC vehicle is the same four things: something that moves it, something that steers it, a battery, and a radio that connects them to your thumbs. The differences are in what those four things push against. A car pushes against the ground, a boat against water, a plane against air, a drone against air with no wing to help, and a submarine against water while trying not to let it in. You pick the medium. The printer, the CAD and the electronics kit are the same for everyone.
The project runs six weeks. The first two are design and bench testing, and no vehicle part gets printed until the electronics work on the bench and the assembly in Fusion has every bought part modelled at true size. The middle two weeks are printing and building, and there will be reprints. The last two are testing, fixing, and testing again, with a build log that records what broke and what you did about it.
Pick your pathway with your eyes open. A car is the surest route to a finished, working vehicle and still has plenty to design. A boat adds waterproofing. A plane adds mass discipline: every part is printed light or it does not leave the ground. A drone adds a flight controller you have to configure and a set of rules about where it can fly. A submarine adds all of the boat’s problems plus ballast, pressure and losing radio signal underwater. Harder is not better. A car that works is worth more than a submarine that sinks once.
The five pathways, what you print for each, what is hardest, and the test that counts as working:
| What you print | What is hardest | First test | |
|---|---|---|---|
| Car | Chassis, steering knuckles, motor mount, body | Steering geometry that returns to centre; a gear or belt drive that does not skip | Drives a figure-eight on the shop floor |
| Boat | Hull in two halves, deck, rudder, motor mount | A hull that does not leak at the shaft tube; a rudder with enough authority | Crosses the pool and turns back under control |
| Plane | Fuselage, wing sections, tail, control horns | Total mass under 250 g; CG in the right place | Hand launch, straight glide with the motor off, then a powered circuit |
| Drone | Frame, arms, landing gear, camera or battery mount | Frame stiffness; the flight controller set up correctly | Hover at 1 m for 30 s, hands off the sticks except throttle |
| Submarine | Sealed hull, ballast tank, dive planes, shaft seal | Neutral buoyancy; keeping water out for ten minutes at 1 m | Floats level, dives and returns on command in the pool |
Skills needed
- The electronics kitresource comingTransmitter, receiver, a brushed ESC and motor, a 9 g servo, and a 2S LiPo or a 6-cell NiMH. How each part talks to the next, and how to test the whole chain on the bench before anything is printed.
- Designing for FDMPrint orientation for strength, clearances for moving parts, heat-set inserts, and splitting a part that is bigger than the bed.
- Modelling from sketchesA chassis is a frame with holes in it. Lay out the mounting holes for every component from its datasheet before you draw anything else.
- Parameters that match your partsMotor diameter, servo body, battery size and axle diameter as parameters. When the part in the bin is not the part in the drawing, you change one number.
- Reverse engineering a mechanismTake a cheap RC toy apart. Its gearbox, steering link and battery bay are a free lesson in what works.
- Waterproofing and buoyancyresource comingBoats and submarines only. Sealed hulls, greased shaft tubes, how much foam it takes to float 300 g, and where the ballast goes.
- Flight basicsPlanes and drones only. Build the glider first if you have not. Centre of gravity, control surfaces, and why a plane that is 20 g too heavy does not fly.
- Batteries and chargingresource comingLiPo rules. Charge in the bag, never below 3.3 V a cell, never puffed, never unattended.
Assessment
| Criterion | Developing | Proficient | Exemplary |
|---|---|---|---|
| Proposal | A picture and a wish | Three-view sketch, parts list with masses, pathway chosen with the hardest problem named | The hardest problem has a plan and a fallback |
| Fusion assembly | Printed parts only, bought parts missing or guessed | Every bought part modelled to its datasheet; mounting holes and clearances correct first print | Parameters for motor, servo, battery and axle; a part swap is a number change |
| Bench test | Electronics connected after the vehicle is built | Motor and servo respond correctly on the bench, filmed, before the first vehicle print | Failsafe tested: transmitter off, motor stops |
| Printing and build | Parts fail the same way twice | Orientation chosen for strength, inserts and fasteners used, reprints reduced each week | Under mass budget with margin; nothing held on with tape |
| Vehicle performance | Moves | Passes the pathway’s first test | Passes it three times in a row, with a second test of your own design |
| Build log and reflection | Photos only | A photo and a note per week, failures included, and a reflection against the proposal | Log shows a decision changed by evidence, and the next version is specified |
The Fusion assembly and the bench test carry the most weight because they are what stop the last two weeks from becoming a rescue.
Deliverables
- A vehicle proposal with a three-view sketch, the chosen pathway, the parts list with masses, and the one thing you think will be hardest
- A Fusion assembly with every printed part and a model of every bought part, with the key dimensions as parameters
- A bench test video showing the motor and servo responding to the transmitter before the first print
- The finished vehicle, driven, sailed, flown or dived in a recorded test
- A build log with a photo and a note for each week, the print failures included, and a final reflection against the proposal
Materials
- Per student, a 2-channel 2.4 GHz transmitter and receiver, a brushed 130 or 180 motor with a 20 A ESC, a 9 g servo, a 2S 450 mAh LiPo with a charger, and a XT30 lead
- PLA and PETG; LW-PLA for planes
- M3 heat-set inserts, M3 screws, 3 mm steel rod for axles, brass tube for shafts
- For a car, four rubber wheels or TPU to print them
- For a boat, a 2 mm shaft, a propeller and a stuffing tube
- For a plane, a 2 mm carbon spar
- For a drone, a flight controller and four brushless motors with ESCs
- For a submarine, silicone grease, an O-ring set and syringes for ballast
Steps
Week 1: Choose, take apart, propose
- Take apart the RC toy on the bench. Photograph the drive, the steering and the battery bay. Write down what each part is made of and why it is shaped that way.
- Pick a pathway. Read its row in the table and the skill notes that apply. Name the hardest problem in your proposal and how you will find out early whether you can solve it.
- Parts list with masses. Weigh the motor, servo, receiver, ESC and battery on the scale. For planes and drones, add up the electronics and subtract from 250 g: that is the printed mass you have left, and it is less than you think.
- Three-view sketch at scale, with the electronics drawn in at their real size.
Week 2: Bench and CAD
- Wire the kit on the bench: battery to ESC, ESC to receiver, servo to receiver. Bind the transmitter. Film the motor changing speed and the servo swinging on the sticks. Turn the transmitter off and confirm the motor stops.
- In Fusion, model every bought part as a simple body with its real outer dimensions and mounting holes. Motor, servo, ESC, receiver, battery, wheels or propeller.
- Make the dimensions that will bite you into parameters: motor diameter, servo body, battery length, axle or shaft diameter, wall thickness.
- Design the printed parts around the bought ones. Use joints in the assembly so the steering and the drive move and you can see what hits.
- Check every part against the bed. Split what is too big, with a lap joint and two screw holes, not a butt joint and hope.
Week 3: Print the structure
- Print the main structural part first: chassis, hull halves, fuselage or frame. Check every mounting hole with the real part before you print anything else.
- Fit heat-set inserts and dry-fit the electronics. Anything that does not fit gets fixed in the model, not with a file.
- Print the moving parts. Steering knuckles, rudder, control horns, dive planes. Test each one moves freely on its pivot before it goes on the vehicle.
- Log the failures. A warped hull half or a snapped arm is a note about orientation or wall thickness, and it goes in the log with a photo.
Week 4: Build and first test
- Install the electronics. Route wires so nothing moving can touch them. Secure the battery so it cannot shift under acceleration or in a crash.
- Boats and submarines: seal the hull and leave it in a tub for ten minutes with a paper towel inside. Dry towel or start again.
- Planes and drones: weigh the finished vehicle. Balance it at the CG mark. Over 250 g or off balance, back to Week 3.
- First test, indoors or in the pool, low and slow. Someone films it. The goal is to find out what is wrong, not to show off.
Week 5: Fix what the test found
- List everything the first test showed. Order it by what stops the vehicle from working, not by what is easiest.
- Fix in the model, reprint, refit. Keep the failed parts and photograph them next to the new ones for the log.
- Second test. Same course, same recording. Compare.
Week 6: Pass the test, record it, reflect
- Run the pathway’s first test three times. Film all three. If it fails one, fix it and run three more.
- Design a second test of your own that shows something the first does not: a slalom, a loaded run, a timed lap, a dive to a depth.
- Finish the build log. Write the reflection against your proposal: was the hardest problem the one you named, and what would version two change?
Stretch options
- Replace the receiver with an Arduino and a radio module, and add a sensor that changes the vehicle’s behaviour: a distance sensor that stops the car, a leak sensor that surfaces the submarine.
- Print a body or hull in TPU or LW-PLA and compare mass and stiffness with the PLA version.
- Add a camera and drive, sail or fly it from the screen.